
Minimal and Classy Nails: A Manual for Simple Sophistication
Table of Contents
Fed up with nail art that seems more like a task than a pleasure?
Minimal and Classy Nails Imagine if your manicure could leave you feeling elegant, refined, and effortlessly stylish with nearly no maintenance! In the current fashion scene, the most striking statement is frequently the most subtle one.
Chic and understated nails are leading trends, providing a profound method of self-care that conveys elegance. This isn’t merely about dull nails—it’s about purposeful, refined style that enhances your confidence from your fingertips upward. Prepared to unveil how less genuinely transforms into more?
Why Are Simple and Elegant Nails Trending Right Now?
Take a glance at the innovators on the catwalks, plus the “subtle elegance” aesthetic.
Fashion has adopted sleek lines, premium materials, and classic items. Our beauty practices are aligning! Simple and elegant nails provide an ideal final detail to this contemporary style. They enhance any look—from denim and a t-shirt to an elegant gown—without overshadowing the ensemble.
What elements contribute to a design being both minimal and elegant? It’s the skillful application of negative space, a flawless single line, or a delicate wash of color that accentuates your natural beauty. It’s the skill of nuance. This emphasis on simple and elegant nails signifies a movement towards purposeful living and sophisticated personal style.
Your Resource for the Finest Minimal and classy Nails
Let’s examine the particular styles that characterize this refined trend. Which one will become your new hallmark?
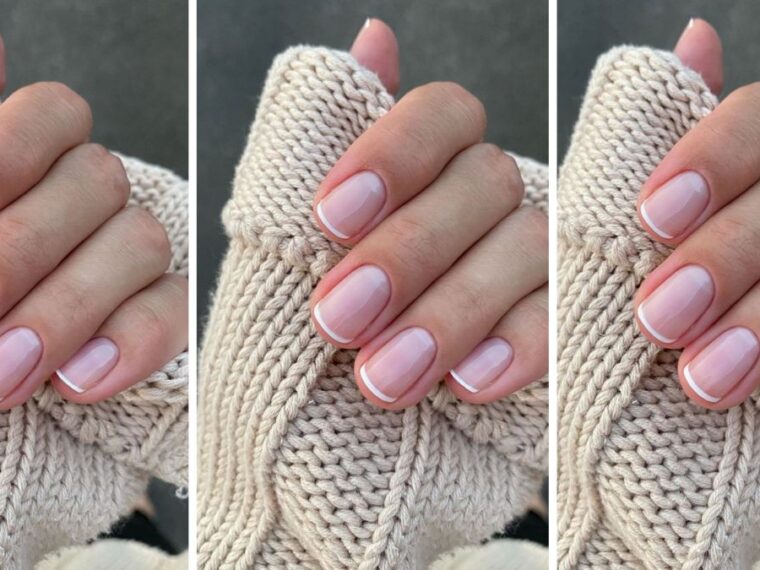
1. The Contemporary French: A Everlasting Classic, Reimagined
The thick, bright white tips are no longer present. The French manicure emphasizes delicacy and gentleness.
- The Appearance: A transparent, nude, or soft pink foundation combined with a very fine tip in white, light peach, or a subtle chrome
- Why It’s Essential: It provides the perfect “my nails but improved” appearance. It lengthens the fingers, appears flawlessly neat, and is suitable for any event. This nail art is a classic example of tasteful yet uncomplicated nails.
- Consider This: Do I favor a sharp edge or a gentle, faded ombré (the “baby boomer” effect) for a contemporary touch?
2. The Graphic of Negative Space: Stylish & Architectural
This is the intersection of art and manicure. Exposing sections of the natural nail allows for bold, contemporary designs.
- The Appearance: Envision sleek lines, geometric openings, a basic crescent at thecuticle, or a solitary diagonal cut across the nail.
- What Makes It So Stylish: It seems new, purposeful, and ahead of trends. A subtle yet striking statement is made with a delicate black line on your natural nail. This design demonstrates that elegant and simple nails can be extremely imaginative.
- Consider This: Is it better to outline the negative space using a neutral shade like taupe, or to choose a striking deep espresso brown?
3. The Short Version of What “Minimalism is Vital” Is All About At times, a single flawless line is everything your nails require.
- The Appearance: A sharp, narrow line in a different hue. Set it in the middle, on the point, or at a steep angle.
- What Makes It Engaging: Its strength resides in its moderation. A shiny silver line on a blush background or a matte black line on a glossy nude is undoubtedly stylish. It’s a centerpiece of subtle and elegant nails that never screams.
- Consider: Do I prefer my line shiny for a crisp appearance, or dull for a more gentle, smooth texture?
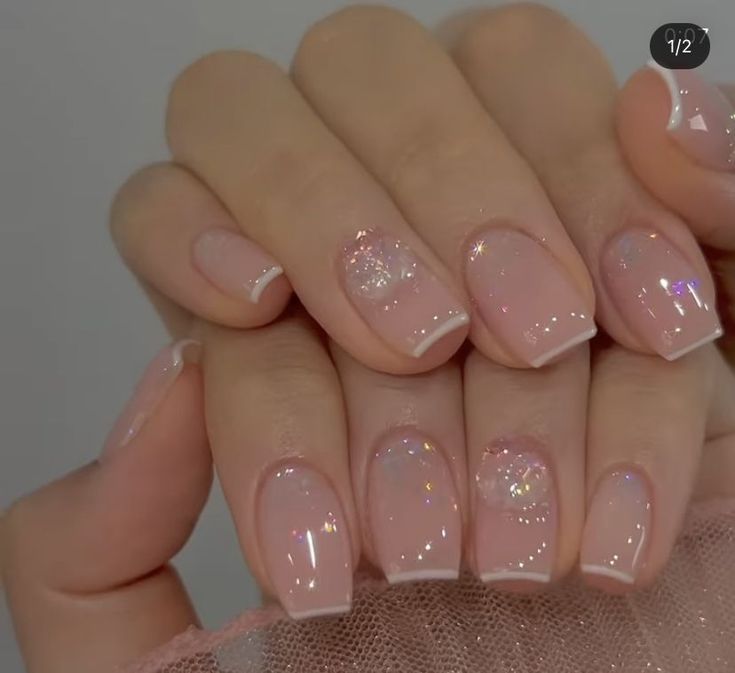
4. The “Glazed Donut” & Pure Excellence: Radiant Wellness
This style, a favorite among celebrities, focuses on desirable, radiant shine
- The Appearance: A layer of translucent, iridescent pink or beige, finished with a shiny, glassy top layer. The outcome is a radiant, “glossy” appearance.
- Why It’s Always Flattering: It gives nails a naturally flawless and well-maintained appearance. It looks great with everything in your storage space. Reaching this appearance is fundamental to the elegant and understated nails concept.
- Consider This: Is there a transparent polish available that creates a “blur” effect to smooth out my nails for an even more flawless appearance?
5. The Strength of the Ideal Neutral: Your Distinctive Hue
Never undervalue the assurance that arises from the ideal nude.
- The Appearance: A rich, non-transparent lacquer in a hue that complements your complexion—whether it’s a gentle beige, a warm brown, or a cool taupe.
- Reasons It’s a Wardrobe Must-Have: It’s effortless, lengthening, and eternally elegant. Locating “your” nude transforms everything. This represents the most essential style of simple and elegant nails.
- Reflect: Does this color enhance my skin’s undertones (warm, cool, or neutral)?
Tips for Prolonging the Life of Your Elegant and Simple Nails
The charm of simple and sophisticated nails lies in their durability. A couple of easy steps help them stay looking fresh for an extended time.
Step 1: Collect Your Basic Tools (You Don’t Require Much!)
- The fundamentals: a base layer, your chosen polish (a nude, white, or soft pink is best to start with), cotton pads, a nail file, a cuticle pushier (or orange stick), nail varnish remover, and a glossy top layer.
• The optional “Pro” modifications: Get a piece of fine striping ribbon for edges that are sharp and a dotting tool (or bobby pin!) for tiny details.
Step 2: The New Beginning: Mold and Get Ready
- Carefully take off any old polish.
- Shape your nails into a gentle square or oval form—both are elegant and enduring. Always file in a single direction to avoid splitting.
- Immerse your fingertips in warm, soapy water for 2 minutes to loosen cuticles. Lightly press them back; avoid cutting them.
- Completely dry your hands and use a cotton pad with polish remover on each nail. This eliminates oils, allowing your polish to adhere more effectively.
Step 3: The Base Layer – Primer is Essential!
- This single action is your hidden advantage. A transparent base layer stops staining, prolongs the life of your polish, and establishes an even surface. Allow it to dry fully.
Step 4: The Hue – Light Layers Take the Lead
- Shake your polish, then rub the bottle between your hands to blend.
- The golden guideline: two light layers are preferable to one thick layer.
- Put on the first layer, allow it to dry for 2-3 minutes, then apply the second layer. Thin layers dry more quickly and appear more polished.
Step 5: The Essential Artwork (Simple Concepts to Experiment with!)
This is the place to establish your elegant and understated nails signature. Begin with one of these reliable concepts:
- The Single Stripe: After your color has dried, apply two parallel strips of striping tape to your nail. Apply a contrasting color to the exposed line, allow it to dry for 30 seconds, and then remove the tape for a flawless stripe!
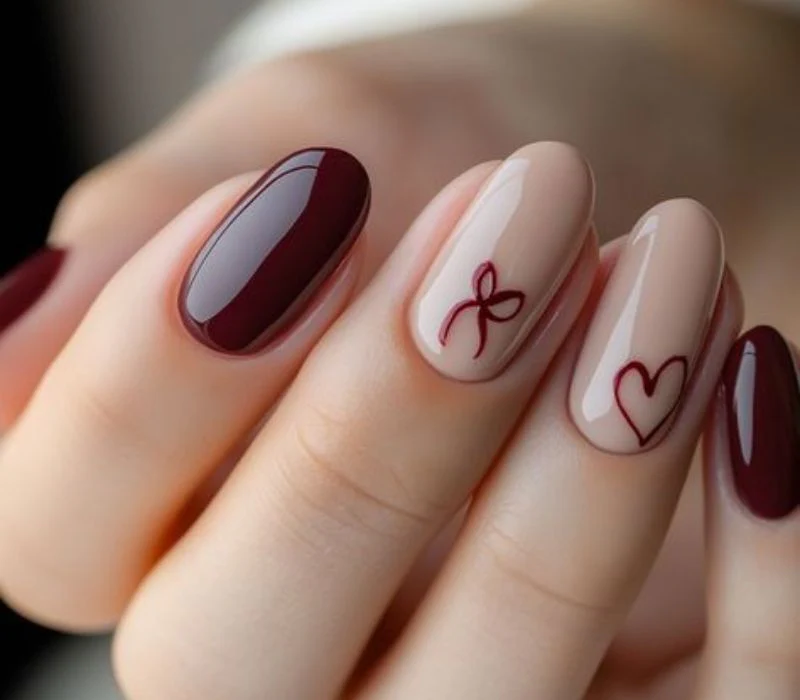
- The Contemporary Dot: With your dotting tool or bobby pin, create a tiny, singular dot close to your cuticle or at the edge of your nail. Fewer is better!
- The Accent Nail: Apply one color to all nails, leaving only your ring finger in a different, matching hue. Automatically elegant.
Step 6: The Enchanted Barrier – Final Layer
- Apply a thick coat of glossy top coat to your artwork. Coat the tip of your nail by lightly applying the top coat just beneath the free edge. This “locks in” the manicure and stops early chipping. This is what provides you with that glossy shine like in a salon.
Step 7: The Final Detail – Oil & Patience
- Use cuticle oil or a thick hand lotion around your nails. It not only appears well-groomed but also maintains your skin’s health.
- Exercise patience! Allow yourself about 30-60 minutes of relaxed activity (such as watching a show or reading) to ensure everything sets properly.
Simple Troubleshooting Advice for Novices
- Got polish on your skin? Stay calm! As soon as everything is completely dry, get in the shower. The heated water will aid in softening the polish on your skin, allowing it to peel away easily, resulting in a flawless manicure on your nails.
- Nail smudged? Allow it to dry fully, then apply a small amount of the same polish on top and finish with a new layer of top coat. Make it straightforward. Your aim is simple and elegant nails, not flawlessness. A slightly uneven line or a small bubble gives personality! It’s concerning the routine and the self-care regimen.
- Closing Motivation: Crafting simple and elegant nails at home is a form of artistry and self-care. It’s budget-friendly, uplifting, and the outcomes will fill you with pride. Your hands will appear refined, and you’ll feel the self-assurance that arises from treating yourself to something lovely. So, get your polish, inhale deeply, and enjoy the process.
Conclusion: Sophistication is a Decision
Ultimately, adopting simple and elegant nails goes beyond just nail polish—it’s a means of self-respect and purposeful fashion. It’s selecting elegance instead of chaos, excellence rather than abundance, and a classic appearance over a passing fad. Your nails transform into a delicate adornment that reveals much about your confidence and style.
Why not allow your fingertips to express the serene, potent grace that resides within you? Begin with a single, elegant design and experience the surge of vitality that arises from this refined, effortless approach to self-care.
One comment on “Minimal and Classy Nails”