
Table of Contents
Every time after apply the Nail Polish, it accrues the question in mind that why nail polish chips quickly and what are most commonly causes, Prevention Tips, and Easy Solutions of it.
Have you ever dedicated time to painting your nails, only to notice the polish begin to chip within a day or two? It can be disappointing when a new manicure dulls its luster so fast. If you frequently question why nail polish chips quickly, you’re not the only one. Numerous individuals face this issue, but the positive aspect is that many of the underlying reasons can be avoided.
Grasping the reasons behind rapid nail polish chipping can enhance your nail care regimen and allow for more enduring at-home manicures. Correct nail preparation and selecting the appropriate products can lead to significant improvements with minor adjustments.
This guide will reveal the typical causes of chipped nail polish, show you how to extend the life of your manicure, and present useful nail care advice that is easy for anyone to implement.
Why does my polish chip?
If your polish begins to chip within just a few days, it’s typically because of a minor detail missed at one of these three points: before, during, or after application.
Before application: weakened nails
Nails that are soft, brittle, or split are a primary reason for nail polish chipping quickly. Why? Due to various factors, keratin—the essential protein that provides structure to nails—can be weakened:
- A deficiency in vitamins or minerals, particularly zinc, iron, or vitamin B.
- Frequent minor injuries or nail-biting.
- Lack of hydration, which may lead to small, invisible cracks that hinder proper adhesion of polish
While applying: inadequate preparation or method
Keep in mind that durable polish begins “before” applying the initial coat! Several typical mistakes can derail your entire manicure:
- Inadequate preparation: cuticles on the nail surface, an unpolished or oily base—these can hinder effective adhesion.
- • Improper application: applying thick layers, insufficient drying time (air-drying or LED), omitting base and top coats—any of these can reduce the longevity of your polish.
- Mixing different brands: the formulas may not work well together. Products within a single range are designed to be fully compatible and work in synergy for optimal results.
After application: habits to avoid
A flawless polish job can still chip if your manicure isn’t adequately safeguarded. Here’s what to avoid:
- Extended contact with hot water (dishwashing, lengthy showers, or baths) may cause the nail to expand slightly and loosen the polish.
- Aggressive cleaning agents can change the finish of the surface.
- Daily micro-traumas (such as typing or opening jars) can harm the ends of your nails.
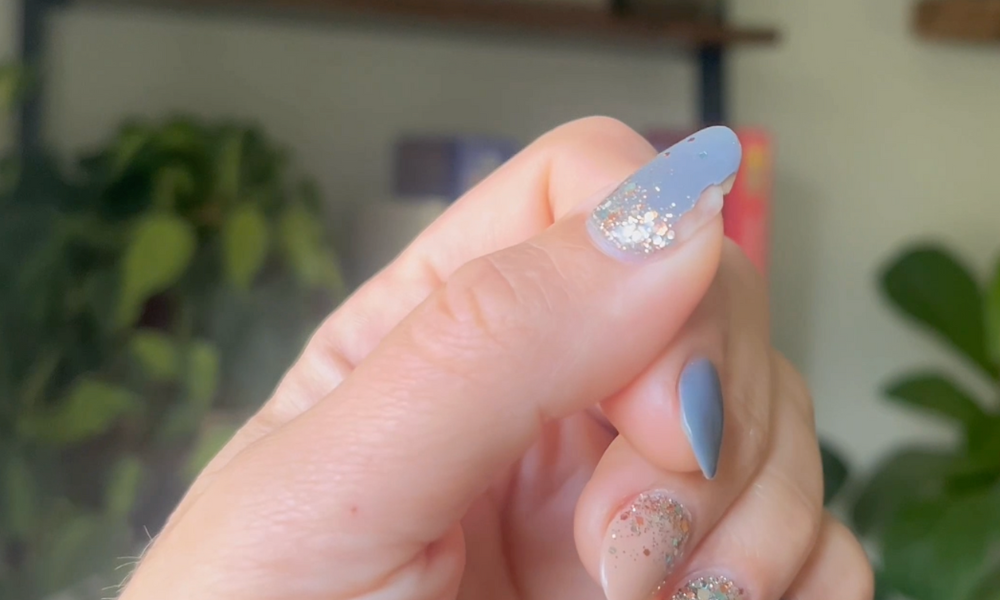
Why Nail Polish Chips Quickly: Typical Factors:
Do you think your nail polish doesn’t endure as long as it ought to? A variety of elements could be accountable.
1. Are Your Nails Excessively Oily?
A prevalent cause of fast nail polish chipping is the presence of excess oil on the nail’s surface. Natural oils, hand creams, and lotions may hinder nail polish from sticking effectively.
Prior to polishing, ensure your nails are clean and then wipe them using rubbing alcohol to eliminate any leftover residue. A clean nail surface enables polish to adhere better.
Nail Health is Important: At times, the issue isn’t the finish whatsoever. Your nails could be the reason. If your nails are brittle, dehydrated, or harmed, the polish might struggle to stick. Brittle nails are susceptible to breaking, and the polish may begin to chip with the slightest force.
If this describes you, think about adding nail care to your regimen. Regularly hydrate your cuticles and nails, and consider incorporating a strengthening treatment to provide the nourishment required for a perfect manicure.
2. Are You Neglecting the Base Coat?
Do you occasionally put nail polish directly on your nails? Although it might be time-saving, omitting the base coat can greatly shorten the durability of your manicure.
Base coat serves as the underlying layer for all that is applied above it. Its purpose is to establish a solid connection between the natural nail and the subsequently applied polish. Consider it like adhesive tape with two sides; one adheres to the nail plate while the other bonds with the polish. This is the way to attain ideal bonding.
Certain brands are releasing nail polish that doesn’t need a base coat. If you are NOT utilizing a base-free choice, you should apply base coat each time.
A base layer provides a uniform surface and enhances the polish’s adherence. It additionally safeguards natural nails against discoloration.
3. Are You Using Heavy Coatings?
One significant factor causing nail polish to chip rapidly is the application of thick layers. Bulky coats require more time to dry and stay soft inside, which increases their susceptibility to dents and peeling.
Let’s dive into the exciting part; the color! At this stage, you’ve prepared tirelessly, put on that pesky base coat that may seem useless, but truly makes a difference, and you’re all set for color.
When applying color, it’s important to ensure that you make thin applications uniformly. Chipping can likely occur if the application is too thick and unable to dry correctly. Spend your time, concentrate on every stroke and paint the whole nail from side to side, and top to bottom. Suggestion: Begin painting with your less skilled hand. At the start, you will possess the greatest patience, concentration, and self-discipline. For instance, if you are right-handed, start by painting your right hand (using your left hand).
Instead, apply two or three thin coats for a smoother and more durable finish.
4. Nail Polish Standards:
Not every nail polish is the same. If you use an inexpensive or poor-quality polish, you may observe it breaking off more quickly than premium alternatives. Certain polishes have components that are not as long-lasting, and they simply cannot endure the everyday wear and tear.
Seek out polishes that are known for their durability, and think about choosing formulas that explicitly guarantee extended wear. Although it’s alluring to choose the cheaper bottles, investing slightly more can assist you in steering clear of that often-seen chipping issue.
5. You aren’t providing sufficient drying time.
We’ve all experienced that. You complete your nails, and the desire to touch everything is intense. However, impatience might be a significant factor for those chips! Even if your nails appear dry on the outside, they could remain soft beneath, particularly if you’ve used several layers.
Allowing your nails sufficient time to completely dry is essential before you continue with your daily activities. This entails steering clear of activities such as typing, texting, or even popping open a soda can until they are fully set. Depending on the finish and the number of coats, this might require up to an hour. It may seem like a lot, but believe us—it’s valuable to maintain your nails’ appearance.
6. Daily Tasks Are Taking a Toll.
Everyday activities such as doing the dishes, tidying up, or even typing on your keyboard can lead to chips if you’re not cautious. When your nails are exposed to water or strong chemicals, the polish may deteriorate much more quickly.
Wearing gloves to preserve your nails is an excellent idea if you frequently expose your hands to water. Additionally, remember to open objects (like Coke cans) with gentleness and deliberateness. Later on, your nails will appreciate it.
Ultimately, rather than being a cause of annoyance, your nails should be an enjoyable and expressive aspect of your self-care regimen. Therefore, the next time you see a chip, attempt to consider what could have caused it and make the necessary adjustments. What is your preferred technique for maintaining flawless nails?
Best Way to Apply Nail Polish at Home
To achieve a professional-looking manicure that endures, correct application is crucial. Begin by thoroughly cleaning your nails to eliminate any dirt, oil, or remnants of old polish, since a clean surface allows the polish to stick better. Then, apply a quality base coat to shield your natural nails and establish a smooth base for the color. When painting your nails, opt for two or three thin coats instead of a single thick one, as thin coats dry more uniformly and are less prone to chipping or peeling.
To enhance the protection of your manicure, gently apply the polish to the tips of your nails to seal the edges. Apply a top coat to enhance shine and provide a protective layer against scratches, peeling, and daily use.
How to Make Nail Polish Last Longer
Maintaining a fresh and chip-free manicure involves adopting a few easy practices. A great method to prolong the longevity of your nail polish is to add a thin coat of top coat every two to three days, which keeps the shine intact and reinforces the protective layer. Consistently applying cuticle oil or hand cream to your cuticles is crucial, as well-hydrated and healthy nails are less likely to crack and peel. Moreover, donning gloves during dishwashing or cleaning safeguards your manicure from water and strong chemicals that may damage the polish. These simple yet effective actions can maintain the beauty of your nails for a longer period and minimize the risk of early chipping.
How to Dry Nail Polish Faster
Waiting for nail polish to dry can be annoying, yet some easy methods can accelerate the procedure. Once you’ve applied your last coat, wait for a minute or two for the polish to dry slightly before immersing your fingertips in a bowl of cold water, which speeds up the hardening process of the polish.
You can also hold your hands in front of a fan or utilize the cool-air feature on a hair dryer to promote quicker drying without causing bubbles. Using thin layers rather than thick ones is an effective method since thin layers dry more consistently and lower the chance of smudging. Adequate drying not only conserves time but also aids in avoiding chips and dents in your manicure.
How to Fix Smudged Nail Polish
Accidentally smearing newly painted nails can be exasperating, yet slight flaws are usually simple to rectify. If the polish remains a bit soft, delicately smooth out the smudged spot using a fingertip that is lightly damp to even the surface. To enhance the visibility of smudges, add another thin coat of nail polish on the impacted area and complete with a top coat for a smooth, uniform look
How to Remove Nail Polish Without Remover
What if you need to remove polish but don’t have remover available?
- Try Fresh Nail Polish: Apply a thick layer of fresh polish and wipe it away immediately. The solvents can help loosen the old polish.
- Use Rubbing Alcohol: Rubbing alcohol or hand sanitizer can gradually break down nail polish when rubbed gently over the nails.
- Lemon Juice and Vinegar: A mixture of lemon juice and vinegar may help loosen polish naturally, although it often requires extra patience.
How to Remove Glitter Nail Polish Easily
An additional efficient method to eliminate glitter nail polish is by utilizing a peel-off base coat prior to applying the glitter polish. When the polish is already applied, softly buff the glitter’s top layer using a gentle nail file, then rub a little coconut oil or olive oil onto your nails. Allow the oil to rest for a few minutes to aid in loosening the glitter particles, then use a cotton pad drenched in nail polish remover to wipe the nails. This technique minimizes excessive friction and aids in preventing your nails and cuticles from drying out too much.
How to Remove Gel Nails at Home Safely
Gel nails should never be peeled off because doing so can damage natural nails.
Gently file off the shiny top coat and place acetone-soaked cotton pads on your nails. Wrap each fingertip with foil and wait for 10 to 15 minutes.Once the gel softens, carefully remove it with a wooden cuticle stick. If necessary, repeat the soaking process rather than forcing the gel off.
How to Remove Acrylic Nails Safely: some Tips
Acrylic nails require patience and proper care during removal.
- Trim the acrylic nails first and soak them in acetone until they become soft.
- Gently lift the softened acrylic without pulling or forcing it.
- After removal, moisturize your nails and cuticles thoroughly to restore hydration.
Nail Polish Mistakes Beginners Make
Could simple mistakes be causing your manicure problems?
Common Errors to Avoid
- Applying thick coats of polish
- Skipping base coat
- Forgetting top coat
- Touching nails before they dry
- Using nails as tools
- Peeling off gel polish
- Neglecting cuticle care
Avoiding these mistakes can dramatically improve manicure results.
1. Why does my nail polish start to chip within a day?
Nail polish can chip rapidly due to oily nails, heavy layers, omitting a base coat, or being in water before the polish cures completely.
2. What can I do to extend the longevity of my nail polish?
Use a base layer, apply in thin coats, seal the tips of the nails, and reapply the top coat every few days.
3. Does warm water lead to nail polish chipping?
Certainly. Warm water can make nail polish more pliable and heighten the chances of peeling and chipping, particularly soon after it’s applied.
4. What causes nail polish to chip at the tips initially?
The edges of the nails undergo the greatest contact in daily activities, rendering them more susceptible to wear and injury.
5. Does old nail polish chip more readily?
Indeed. Dense, aged, or past-date nail polish typically goes on inconsistently and has a higher chance of breaking or peeling.
6. Does Water Ruin Your Manicure?
Frequent exposure to water can weaken nail polish over time. Washing dishes, swimming, and long showers can cause polish to lift and chip. Wearing gloves during household chores can help protect your manicure and keep it looking fresh.
Conclusion
Grasping the reasons behind why nail polish chips quickly is the initial step to obtaining longer-lasting manicures. Chipping typically occurs due to inadequate nail preparation, thick layers of polish, exposure to water, or not enough drying time. Luckily, these problems can be fixed with some easy adjustments to your habits. Using polish correctly, safeguarding your nails from harm, and following good nail care practices can help you maintain stunning, chip-resistant nails for an extended period. A small amount of attention today can prevent regular maintenance in the future.